
Home Sprouting: All You Need to Know!
Always wondered what you need to know to start home sprouting? Ever wonder exactly what sprouts are or how they are made? Sprouts are an excellent source of nutrients that in many ways surpasses the benefits of full-fledged plants. They are easier to digest and the bioavailability of nutrients is increased in sprouts, allowing vitamins and minerals to be more easily absorbed by the body. Not only that, but protein, vitamin and mineral content is often increased in sprouts in comparison to their unsprouted or full-grown counterparts. One of the best parts about sprouting though is that sprouts can be easily grown at home! However, home sprouting can be dangerous if proper precautions aren't taken. Follow these steps to safely begin home sprouting today!
Home Sprouting: Getting Started
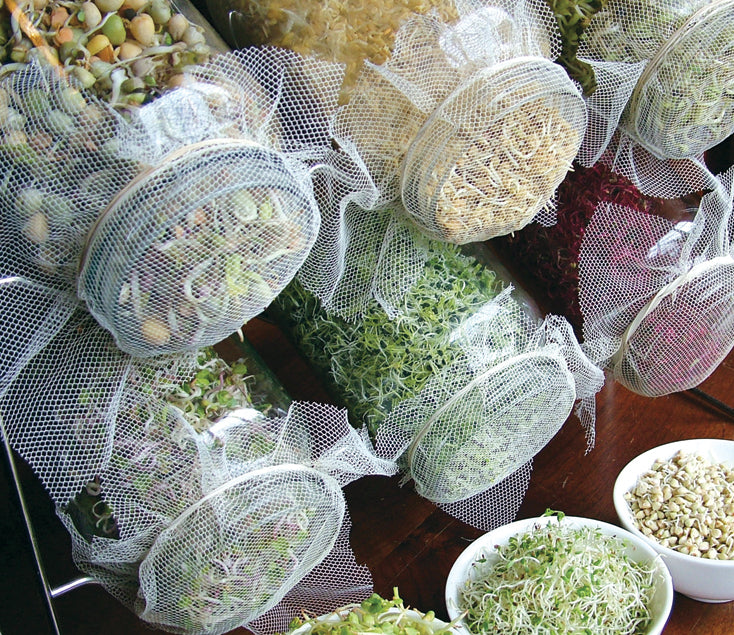
Before home sprouting, you need to decide what seeds, grains, beans, etc. you want to sprout! You can even do a mix of different seeds in one batch, such as alfalfa, red clover, and radish; they don’t need to be grown separately. After you’ve decided what kind of sprouts you want to grow, do a little research on local companies. The more locally grown, the better! If you can’t find any local, you should be able to find some quality brands in grocery stores or online. In any case, be sure to buy a brand of sprouting seeds from a trustworthy company or seller, and be sure that the seeds are marked as “sprouting seeds.” The risk of growing bacteria in your sprouts starts with the seed, so buying quality seeds is the most important step in the process! Now that you have your seeds or know what you want to sprout, you need to get the right equipment for successful home sprouting. There are many home sprouting kits available for purchase, but you can easily and affordably create you own using a mason jar/ball jar, canning ring, and sprouting screen! Assuming you don’t already have a mason jar on hand, buying one (canning ring included) and a sprouting screen will probably set you back around $5. Other than seeds and water, these three items are the only materials you need to get started! As far as setting up the environment, sprouts can be easily grown on your kitchen counter top, no soil necessary! Sprouts need a warm, moist climate to grow, and therefore cannot be stored in the fridge during the sprouting process. However, home sprouting in the summer is risky, especially if your kitchen has fluctuating temperatures or a lot of humidity. The warm conditions that home sprouting requires is the greatest risk factor for bacteria growth, and attempting to grow them in a hot, humid kitchen will further increase the risk. Home sprouting in a controlled climate or in the winter is best, especially because many vegetables are out of season during this time.Ready, Set, Sprout!
Once you have your seeds, equipment, and suitable environment picked out, you’re ready to start your own little jar-garden! Following this routine will provide you with fresh sprouts in a matter of days.- Per one 1-quart mason jar, wash roughly 3 tablespoons of the seeds, grains, legumes, etc. that you are going to sprout. Depending on the size of your mason jar, you will need to adjust how many seeds are used. Following the instructions that came with your sprouting ring, fix it onto the mason jar you will be using. Rinse the seeds in a small amount of water in the jar, drain, then soak them in a mason jar overnight in a few cups of filtered water, keeping the jar at room temperature.
- In the morning, drain all of the water from the mason jar through the sprouting screen. Add a small amount of fresh water to the jar, swirling the water to thoroughly rinse the sprouts. Doing this every day will help reduce the risk of bacterial growth.
- Drain the water again after rinsing, then position the jar at an angle and upside down so that all of the water can drain completely. Placing the jar in a bowl or pot will allow the jar to be upside down without covering the holes; just placing the jar on the counter upside down will form condensation and create a humid environment for your sprouts to grow in, thus increasing bacteria.
- Rinse and drain your sprouts in this way 2-3 times a day, always placing upside down to relieve excess moisture after. Rinsing regularly with fresh water and draining completely is the surest way to create sprouts that are safe to eat raw. After roughly 3-5 days, your seeds, legumes and grains should have all sprouted and grown to fill the jar!
- When your sprouts are grown to the desired length and have started becoming green, you may transfer your sprouts to the refrigerator for storage. When you put them in the fridge, be sure they are as dry as possible; do not rinse just before refrigeration! Your sprouts should keep for up to 5 days in the fridge.
- Eat your sprouts! You can enjoy them in a variety of ways, such as in salads, on sandwiches, blended into smoothies, as a topping for soups, or even used to make sprout soups (such as Korean soybean sprout soup). If you are concerned about bacterial growth on your sprouts for health reasons or because you missed a few rinses during the growth period, cooking your sprouts thoroughly will help ensure safe consumption. However, cooking sprouts also depletes nutritional content, so keep this in mind if you’re looking to get specific nutrients out of your sprouts!

Recent Posts
Healthy Vegan Recipes